The First Bite That Hooked Me
The crispy crunch. The gooey cheese. The spicy pepperoni kick. My first Cheesy Pepperoni Roll-Up was at a friend’s game night. One bite, and I was sold. Ever wondered how you could turn basic ingredients into a crowd-pleasing snack? These roll-ups are my go-to for quick, tasty wins. They’re perfect for busy weeknights or last-minute guests. Try them once, and you’ll see why I’m obsessed. What’s your favorite game-night snack? Share below!My Messy First Attempt
My first batch of roll-ups was… messy. Cheese oozed out, and one tortilla ripped mid-roll. I panicked but baked them anyway. Surprise—they still tasted amazing! Home cooking isn’t about perfection. It’s about joy and flavor. Now I laugh at my early fails. They taught me to embrace the chaos. Have you had a kitchen disaster that turned out okay? Tell me your story!Why These Flavors Work
– The melty mozzarella balances the pepperoni’s saltiness. – Crispy tortillas add a satisfying crunch to every bite. Which flavor combo surprises you most? Is it the cheese and pepperoni or the Italian seasoning twist? I’d love to hear your picks. These roll-ups prove simple ingredients can shine. Don’t skip the marinara dip—it ties everything together.A Slice of History
Roll-ups like these trace back to Italian-American kitchens. They’re a cousin to stromboli, born from clever use of leftovers. *Did you know pepperoni was rarely used in Italy?* It’s an American twist on spicy salami. Today, these bites are a party staple. Want to try a regional version? Swap in chorizo for pepperoni. What’s your favorite cultural twist on snacks? Comment below!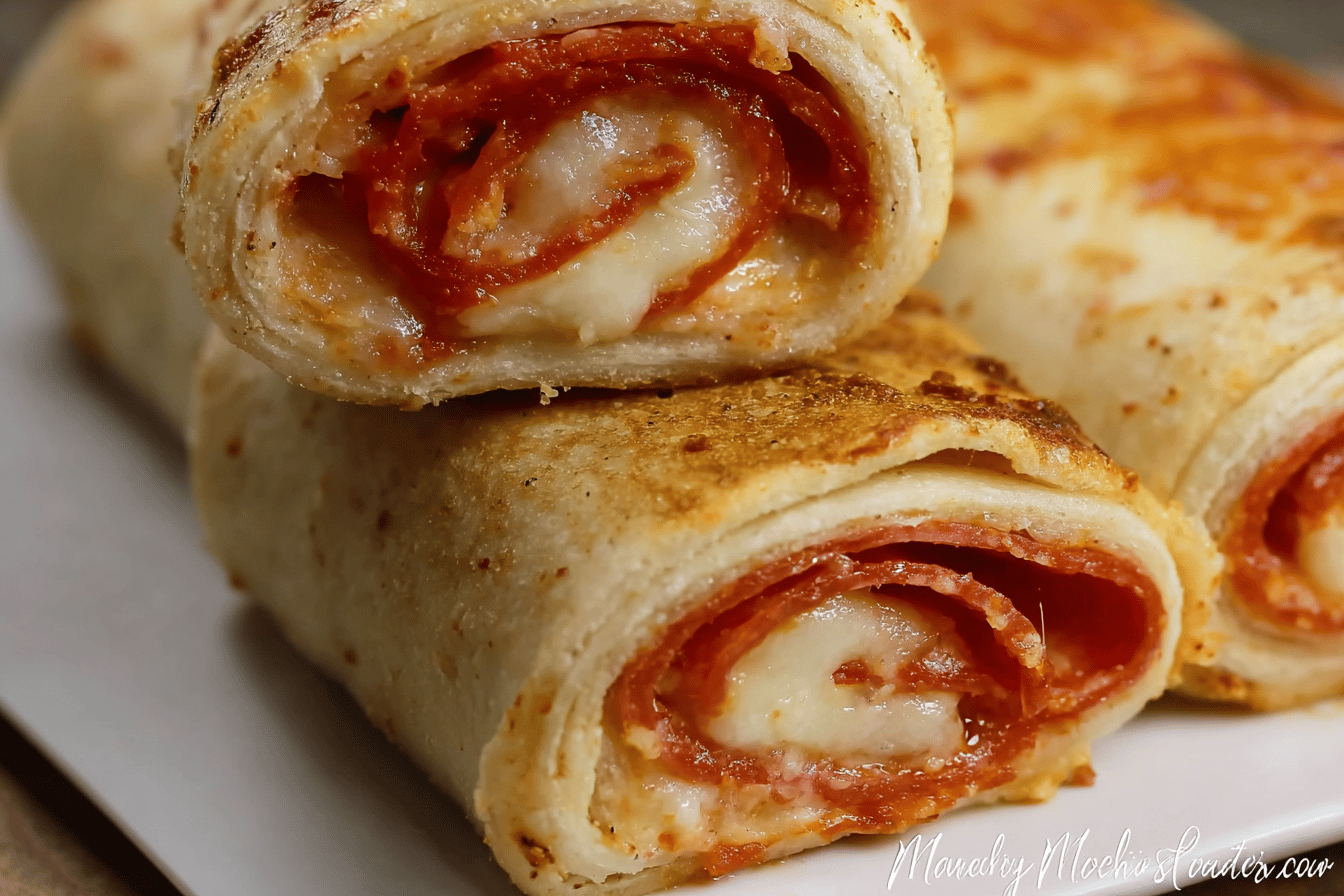
| Ingredient | Amount | Note |
|---|---|---|
| Large flour tortillas | 4 | or your choice of wraps |
| Shredded mozzarella cheese | 1 cup | |
| Sliced pepperoni | 1 cup | |
| Marinara sauce | 1/2 cup | for dipping |
| Italian seasoning | 1 tablespoon | optional |
How to Make Cheesy Pepperoni Roll-Ups
Step 1 Preheat your oven to 400°F (200°C). Line a baking sheet with parchment paper. This keeps the roll-ups from sticking. (*Hard-learned tip: Use non-stick spray too for extra safety!*)
Step 2 Lay tortillas flat on a clean surface. Sprinkle mozzarella evenly over each one. Add pepperoni slices on top. For extra flavor, dust with Italian seasoning.
Step 3 Roll the tortillas tightly from one end to the other. Don’t squeeze too hard—fillings might spill. Place them seam-side down on the sheet.
Step 4 Bake for 10-12 minutes until golden and crispy. Watch closely to avoid burning. Let cool slightly before slicing. Serve with marinara for dipping. What’s your go-to dipping sauce? Share below!
Cook Time: 10-12 minutes
Total Time: 20 minutes
Yield: 4 servings
Category: Appetizer, Snack
Fun Twists on Classic Roll-Ups
Veggie Lover’s Swap pepperoni for roasted bell peppers and spinach. Add feta cheese for a tangy kick.
Spicy Kick Use jalapeños and spicy sausage instead. Top with a drizzle of sriracha mayo.
Breakfast Style Fill with scrambled eggs and bacon. Serve with maple syrup for dipping. Which twist would you try first? Vote in the comments!
Serving Ideas & Pairings
Serve with a crisp green salad or garlic bread. Garnish with fresh basil for a pop of color. Pair with a cold beer or sparkling lemonade. Both balance the richness of the roll-ups. Which would you choose tonight? Tell us below!
Storing and Reheating Your Roll-Ups
Keep leftovers in the fridge for up to 3 days. Wrap them tight in foil or store in an airtight container. For longer storage, freeze them for up to 2 months. Reheat in the oven at 350°F for 5-7 minutes to keep them crispy. *Fun fact: These roll-ups taste even better the next day!* Batch-cooking tip: Double the recipe and freeze half for busy nights. Why this matters: Meal prep saves time and cuts down on stress. Ever tried freezing these? Share your tips below!Fixes for Common Roll-Up Problems
Tortillas cracking? Warm them for 10 seconds in the microwave first. Cheese oozing out? Use less and roll tighter. Roll-ups too dry? Brush with olive oil before baking. Why this matters: Small tweaks make a big difference in texture and flavor. My niece once made these too loose—ended up with a cheesy mess! What’s your biggest kitchen fail? Tell us in the comments!Your Roll-Up Questions, Answered
Q: Can I use gluten-free tortillas?
A: Yes! Just check they’re pliable so they don’t crack when rolling.
Q: Can I prep these ahead?
A: Assemble them, cover, and refrigerate for up to 24 hours before baking.
Q: What cheese swaps work?
A: Try cheddar or provolone for a different flavor twist.
Q: How do I scale this for a crowd?
A: Double or triple the ingredients—just space them out on the baking sheet.
Q: Can I add veggies?
A: Sure! Spinach or bell peppers add color and crunch.
Let’s See Your Creations!
I love hearing how you make these roll-ups your own. Did you add a special ingredient? Tag me on Pinterest—I’d love to see! Cooking is about sharing joy, one bite at a time. Happy cooking! —Amelia Hartwell.